Table of Contents
- How To Make A Messy Bun?
- How To Make A Messy Bun with Your Natural Hair
- The inside-out bun
- The Ballerina Bun
- Easy Messy Half- Bun
- Quick and Easy Top- Knot
- Messy Bun for Curly Hair
- Voluminous Bun
- A Truly Messy Bun
- The High Up Messy Bun
- How To Do A Messy Bun Using A JuvaBun Hair Extension
- Some Styling Tips To Get The Perfect Messy Bun
- When Will You Try Making A Messy Bun?
- Read More:
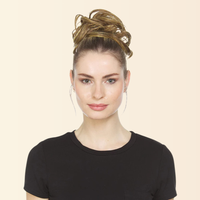
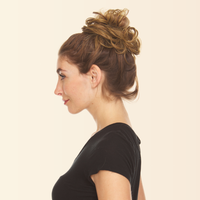
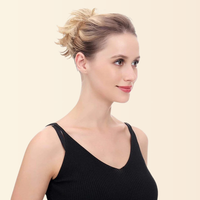
A messy bun is one of the most chosen to do hairstyles among females. It is a tousled knot hairstyle that rests on the top of your head and can come in handy on the days that you do not have the energy or time to do your hair. You can also situate the bun on the back of your head or just at the nape of your neck.
It can be worn for any occasion as it can be both classy and elegant but still casual. Below we are going to be looking into tutorials on how to do messy buns and what equipment we would need, who can pull this style off, and how you can style each bun according to your hair texture.

How To Make A Messy Bun?
There are three easy steps to follow to make sure that your messy bun is perfect.
Firstly, you need to add texture to your hair. Start by brushing your hair gently until it's smooth and knot-free. Spray your hair with hairspray to add some texture and volume to your strands. Make sure to shake the bottle well, spray it on your strands and use a comb to tease your hair at the roots. This will give your hair a clean feeling as well as a full-bodied look.
The next step is to take your hair and put it all into a ponytail. Gather all your hair at the top of your head and tie it into a ponytail. Twist the ponytail into a bun very loosely and then pin it with bobby pins to secure it. However, you do not need to pin it in very neatly. The messier it looks, the better.
You can have ends poking out as this will help enhance the overall look. Take an elastic and loop it around the messy bun two-three times to hold it in place. The last step is then to use hairspray. This will help keep your bun in place and will allow you to rock this look throughout the day without having to fix or check on it.
What is Needed To Make A Messy Bun?
Since this is an easy hairstyle. You do not need a lot of tools and equipment to make a messy bun, this is a hairstyle that can be worn on the go as well as to a sophisticated function. All you need is an elastic band, a few bobby pins, a comb, and some hairspray. You can even add in hair extensions to add length and volume to your bun or purchase the messy bun hair extension from JuvaBun that is easy to clip on and wear.
Who Can Make A Messy Bun?
Anyone can rock a messy bun, from a young child to businesswomen and even grandmothers. This hairstyle does not discriminate and can be down with any length of hair.

How To Make A Messy Bun with Your Natural Hair
Without needing fancy gadgets and products, your hair is more than enough to achieve this hairstyle. There are many different types of messy buns that can be done. Let’s look at the different ones you can make.
-
The inside-out bun
Start by taking all your hair and putting it up in a high ponytail and tying it into place with an elastic band. Then, flip the ponytail upwards to create a loop over your hand. Taking two fingers creates a part right underneath the elastic band at the start of your ponytail. Using the part, take the end of your ponytail and pull it through. Take the rest of the end and wrap it around the elastic, and secure it with a bobby pin.
-
The Ballerina Bun
Take all your hair and put it up into a high ponytail and twist the end. Then, wrap the twist around itself until your hair coils. Use an elastic to secure it into place.
-
Easy Messy Half- Bun
Make a part at the top of your hair starting at the temple and create a part right through your hair. Use a comb to tease the top part of the hair to create more volume. Start teasing at the tips of your hair working towards the roots. Take your hair and twist it into a bun, secure it with an elastic band. You can pull out a few pieces around your face to frame your face and this will help create the messy look effortlessly. Add in bobby pins to secure the hair in place.
-
Quick and Easy Top- Knot
Make your hair into sections right above your ears, then clip the top half up and out of the way. Clip your weft upside down on the top part of your hair. Make a section just above where you have clipped in the weft and clip in a three-clip weft facing downwards. Pull all your hair back into a ponytail and brush through the ponytail to make sure that your hair covers the wefts. Take all your hair and twist them tightly to create a coil around the start of your ponytail. Once you have wrapped your hair, use bobby pins and an elastic band to tie it into place.
-
Messy Bun for Curly Hair
Take all your hair and tie it loosely into a ponytail. This can be tied high or low depending on where you want your messy bun to be. Then, create a 2 to 21/2 inch section in your ponytail and twist it. While holding the twist, take one or two hairs at the tip of the ponytail and pull the rest of the hair towards your head. Use bobby pins to secure it. Keep repeating the above steps until all your hair is up in a bun.
-
Voluminous Bun
Take your hair and make a section at the point where you want your messy bun to be. At the section, clip in a one-clip weft and a two-clip weft right on the top of each other.
Then, create another section above the previous one and clip in 2-3 single wefts. Make another part and add in another 2-clip weft. Tie your hair in a ponytail but only on the end, then pull your hair halfway through by creating a loop. Then, take the rest of your hair and twist it around the start of the ponytail and tuck it into the elastic band.
-
A Truly Messy Bun
By keeping your hair extensions clipped in, you can create a low ponytail by tying your hair at the nape of your neck. Then, twist the elastic band and the remaining pieces of hair by bringing it over the loop and tying it into place.
-
The High Up Messy Bun
Remove all your hair extensions and flip your head forward, thus creating a high ponytail. By holding the start of the ponytail in place, twist the ponytail at the ends of it. Wrap the hair around the start of the ponytail and tie it in place with an elastic band.
How To Do A Messy Bun Using A JuvaBun Hair Extension
Juvabun has various hair extensions that you can use to help you achieve the messy bun hairstyle. Here are the steps that you need to take to be able to do the hairstyle.
First take one layer of hair hanging down and another layer a few inches above the nape of your neck, while you tie the rest of your hair up. Then, use a two-clip weft and clip it upside down right over the path you’ve made between the layers. Let the rest of your hair that you had tied up down and then pin it all up again this time leaving one left of the weft clip hanging down.
Next, take a three-clip weft and clip it the right way down, just below the path you made earlier. Let all your hair hang down and tie it all up into a ponytail. Lastly, take all your hair and wrap it around itself forming a coil, and then use an elastic band to secure it, and there you have it, the perfect messy bun using clip-in hair extensions.
Some Styling Tips To Get The Perfect Messy Bun
Here are some tips to help you do a perfect messy bun for different hair types.
-
For Straight Hair
Be sure to detangle your hair before you start, by brushing out all the knots so that you can tie up your bun without having to struggle. Even though it is a messy look, it’s best to not damage your hair in the process of making it. Also, you can keep it neat and keep it knot-free.
Sometimes your bun might be too small, too flat, or doesn’t have any volume then you can use a texturizing spray to add more volume to your hair before you are styling your hair into a bun.
-
For Curly Hair
Do not use any detangling tool if you have curly hair, it’s best to use your fingers to detangle and gently brush out any knots without damaging your hair with a brush. By using this method, you keep the natural texture of your curls, and this will add volume to your bun.
Finding the right hair tie to secure your messy bun might be a struggle. If you use the wrong hair tie it can leave your hair with dents if it is too tight or stretch out your curls. Rather use silk-lined scrunchies and thin hair ties when tying your hair into a ponytail and securing the bun. You can use bobby pins to equally secure the hair into place.
-
For Wavy Hair
If you want to make a messy bun, do not wash your hair for two or three days. This makes it much easier to have a natural volume and extra texture to your wavy hair. This will also result in your hair being messier and looking more authentic.
If you are worried about your roots being greasy then use dry shampoo to soak up all the extra oil. You should also wrap your hair around the elastic band very loosely when creating the messy bun look to keep your natural wave pattern intact and to avoid damaging your hair.
This will help minimize the damage to your hair texture. It is important to follow these steps and ensure that each method is used for the correct hair texture or else the bun won't look well suited to your hair.

When Will You Try Making A Messy Bun?
Doing the messy bun look can be easy to do as well as be a hairstyle of convenience. It can be an everyday thing or simply on those days where you need a wash. However, even though this hairstyle is messy, it still requires proper hair care treatment and a routine to keep your hair looking healthy, strong, and clean.
You can follow the different tutorials on how to do each type of messy bun hairstyle and also learn new methods on how to get the desired bun of your dreams. Juvabun offers a wide variety of hair extensions that can assist in helping you achieve this look, from messy bun clip-on to sleek ponytail extensions to long single hair extensions that can be clipped in with ease.
Do not hesitate to check the promotional offers on these products, as well as to check up on other in-depth pieces on how to go about doing these hairstyles and where to find the right tools and equipment.


Leave a comment
This site is protected by hCaptcha and the hCaptcha Privacy Policy and Terms of Service apply.