
Every little girl deserves to feel beautiful and confident. One way to achieve that is, by styling her hair in imaginative ways. With options to choose from it can be overwhelming to find the hairstyle for your little one. Luckily we've curated a list of 10 hairstyles for girls that will make your daughter feel like the princess she is. From braids to buns and everything in between these hairstyles are not simple to create. Will also boost your child's self-esteem.
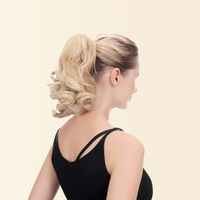
Double Twist Ponytail
The "Double Twist Ponytail" is an artistic variation of the ponytail hairstyle. It involves twisting sections of hair to create a visually appealing look. Here's how you can accomplish the Double Twist Ponytail;
Step 1: Prepare Your Hair
Begin with hair. You may opt to apply some texturizing spray or mousse for added grip and volume.
Step 2: Divide Hair, into Sections
Using a comb divide your hair down the middle creating two sections; left and right.
Step 3: Start by making the ponytail
Gather the section of your hair and bring it down to form a low ponytail at the back of your neck. Fasten it in place with a band.
Step 4: Create a twist in the ponytail
Divide the ponytail into two sections.
Individually twist each section in either a clockwise or counter direction, whichever you prefer.
Now twist these two sections together in the direction, from their twists. This will give you an effect.
Step 5: Secure the twist
Use an elastic band to hold the twisted ponytail securely.
Step 6: Form another ponytail
Take the section of your hair. Gather it into another low ponytail right next to the first one. Make sure both ponytails are aligned parallel to each other.
Step 7: Twist, for the ponytail
Follow the same twisting process as you did for creating the first ponytail; divide it into two sections, individually twist each section and then twist them together in the opposite direction.
Step 8: Secure the twist
Use another elastic band to keep hold of this second twisted ponytail securely.
Step 9: Enhance the Twists
Gently separate the twists to give them volume and depth. This will make the twists more prominent and intricate looking.
Step 10: Touches
Delicately pull at the hair, around the top of your head to add some volume and create a looking appearance.
If you prefer you can wrap a section of hair from each ponytail around the bands to conceal them and achieve a polished finish.
Finish off by using hairspray to set the style in place.
Remember that practice makes perfect especially when it comes to hairstyles. Feel free to adjust the tightness of the twists and position of the ponytails according to your preference. This hairstyle works well for occasions whether its an outing or a formal event and its an excellent way to add a unique touch to a classic ponytail.
Flower Braid
The "Flower Braid" is an imaginative hairstyle that resembles a blossoming flower. It's an updo with braids that's perfect for occasions, like weddings or when you want to add an elegant flair to your appearance. Here's how you can achieve this Flower Braid hairstyle;
Instructions
Step 1: Prepare Your Hair
Begin with washed and dried hair.
If you have naturally hair and would like to add some texture you can achieve that by curling it.
Step 2: Sectioning the Hair
Start by creating a part, on either side of your head allowing you to choose between a part or a side part based on your preference.
Next, divide the section of hair (where you want to create the flower braid) into three sections at the back of your head. These sections will serve as the base for forming the flower braid.
Step 3: Creating the Flower Braid
Begin by braiding these three sections using a regular three-strand braid technique. Commence braiding from the base of these sections near the nape of your neck.
As you continue braiding gradually incorporate strands of hair from around that area into the braid. Essentially this is similar to creating a braid. Only adding hair to one side of the braid.
Step 4: Braiding Continuation
While working your way around your head maintain adding strands of hair into the braid in order to follow a circular or flower-like pattern. This will result in an appearance resembling petals curving around.
Step 5: Securing Your Braid
Once you have finished braiding. Achieved your desired flower shape, securely fasten it using appropriate methods such, as pins or elastic bands.
Once you have integrated all the strands of hair. Formed the shape of a flower proceed with a three-strand braid for a few more inches.
Secure the end of the braid using a band.
Step 6: Style the Remaining Hair
If there are any strands left that weren't used for the flower braid you can curl them to give a touch to this hairstyle. This will create a contrast, between the braided flower and the textured curls.
Step 7: Tuck and Secure
Gently lift the flower braid. Arrange it in a shape resembling an actual flower. You can gently pull on sections of the braid to make it look fuller and more voluminous.
Use bobby pins to secure any sections and keep the flower braid in place.
Step 8: Flourishes
Spritz some hairspray over your hairstyle to set everything in place and prevent any flyaways.
Optionally you can enhance the center of your flower braid by adding pins or accessories for a stylish touch.
The Flower Braid is a hairstyle that is bound to captivate attention while providing a touch to your overall look. Experiment, with sizes and shapes of braids to achieve your desired effect.
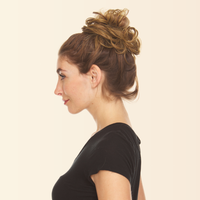
Messy Bun
The messy bun is an versatile hairstyle that works well for both more formal occasions. Its known for its effortless and relaxed look. Here's how you can achieve a bun;
Instructions
Step 1: Prepare Your Hair
Start with either washed hair or hair that has some texture (slightly unwashed hair tends to hold the style better).
You can optionally use texturizing spray or dry shampoo to add grip and volume.
Step 2: Gather Your Hair
Bend forward. Gather all your hair at the top of your head as if you were making a ponytail. Use your fingers to smooth out any bumps or tangles.
Step 3: Secure the Hair
Hold the gathered hair with one hand. Secure it with a hair tie. When you're about to pull the hair through for the loop of the tie don't pull it all the way—leave the ends sticking out.
Step 4: Create the Bun
Hold onto the base of your hair with one hand while using your hand to wrap the remaining hair, around the tie. As you do this you'll be forming a bun.
Here's how you can achieve a casual look for your hair bun without worrying about making it too perfect;
1. Keep wrapping your hair until you've formed a bun around the elastic.
2. Secure the bun in place using pins. Insert them through both the hair and the elastic underneath to anchor. Hold the bun securely.
3. To create a messy appearance gently pull on different sections of the bun to loosen it. This step allows you to customize the level of messiness based on your preference.
4. If there are any strands or shorter layers that didn't make it into the bun you have two options; leave them out for a look or carefully tuck and pin them into the bun for a neater appearance.
5. For finishing touches you may choose to use a light hold hairspray to set your hairstyle and prevent flyaways.
6. To soften your look consider pulling out a face framing strands.
Remember these steps will help you achieve that chic vibe, with your hair bun.
Remember, the charm of the bun lies in its imperfection. Embrace the carefree vibe of this hairstyle. Enjoy personalizing it to match your own taste.
Vibrant and Colorful Rainbow Braids
Rainbow braids are an lively hairstyle that incorporates shades of the rainbow into braided hair. This fun and imaginative look can be achieved using hair extensions, temporary hair color or colorful ribbons. Here's how you can create your own rainbow braids;
Instructions:
Step 1: Prepare Your Hair
Begin with hair. If you have colored hair the rainbow shades will appear more vibrant. However, if you have hair you can still achieve the rainbow effect by using extensions or temporary hair color.
Step 2: Gather Your Materials
Select the colors of the rainbow that you'd like to incorporate into your braids. The classic rainbow colors include red orange, yellow, green, blue, indigo, and violet.
Step 3: Section Your Hair
Divide your hair into sections based on how many colors you're using for your rainbow braids. For instance, if you're working with seven colors divide your hair into seven sections.
Step 4: Adding Color
To get started apply the color to each section of your hair. You have options, like hair color sprays, chalks, or even colored hair extensions. Just make sure to follow the instructions provided with the product you choose. Some may require you to apply the color to your hair while others involve attaching extensions.
Step 5: Braiding Each Section
Once you've applied the color it's time to braid each section of your hair. Select a braiding style that you feel comfortable with such as a three-strand braid, French braid or fishtail braid. Incorporate the strands into the braids to achieve that vibrant rainbow effect. For instance, in a three-strand braid, one of those sections can be a strand.
Step 6: Securing the Braids
Use bands to secure the ends of each braid. Depending on your preference and desired look you can leave the ends loose for a bohemian style or tidy them up neatly.
Step 7: Arranging and Styling
With all your braids completed it's time to arrange them in whatever way suits your fancy. You can gather them into a ponytail for a look. Leave them hanging loosely for a casual vibe. If you're feeling adventurous try creating an updo using your braided rainbow hair!
Step 8; Choose your style;
If you have applied hair color you can use a hairspray or setting spray to prolong the vibrancy of the colors and prevent any potential transfer, onto your clothes or skin.
Step 9: Embrace the joy of your braids
Embrace the playful essence of your rainbow braids. This unique hairstyle is bound to make a statement and capture attention wherever you go.
Remember that creating rainbow braids may involve some trial and error especially if you're using hair color products or extensions. Be sure to follow the instructions provided with the products and enjoy expressing your creativity through this hairstyle!
Side Braid
Creating a side braid is a timeless and versatile hairstyle that suits both formal occasions. Here's a simple guide, on how to achieve a side braid;
Instructions
Step 1:Prepare Your Hair
Start with washed and dried hair. If your hair is too smooth and slippery you can use some texturizing spray or dry shampoo to add grip and volume.
Step 2: Choose a Side
Decide which side you'd like the braid to fall on—left or right—based on your preference.
Step 3: Gather Your Hair
Brush your hair thoroughly to remove any tangles and ensure it's nice and smooth.
Sweep all of your hair over, to the chosen side. For a look, you can part your hair on that side. If you prefer an effortless vibe simply sweep the hair without parting it.
Step : Divide Your Hair
Separate your hair into three sections; left, center, and right.
Step 5: Start Braiding
Take the section of hair. Cross it over the center section so that it becomes the new center strand.
First cross the section, over the center section so that the left section becomes the new center. Repeat this process by crossing the right and left sections over the center section alternately.
As you continue braiding incorporate a section of hair from the edge of your hairline into the right section before crossing it over the center. This will create a braid effect, where you pull hair from one side only. Keep repeating this step as you braid down your hair.
Continue braiding until you reach your desired length or until you have incorporated all of the hair from that side. Once all of the hair is incorporated into the braid continue with a three strand braid for a few inches. Secure the end of the braid with an band.
If desired gently tug, on sections of the braid to loosen it and create a more textured look. This can give your braid added thickness and volume. Finally if you like use a light hold hairspray to set your style and prevent any flyaways.
You can also let a few strands of hair fall loose around your face to create a look. The great thing, about a side braid is that you can customize it to match your style. Feel free to experiment with braid sizes, tightness and placement until you achieve the desired look.
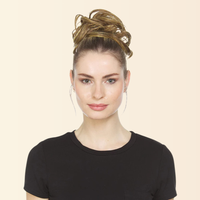
Top Knot
A knot is an effortless hairstyle where you gather your hair into a bun on the top of your head. It works well for both formal occasions providing a way to keep your hair away from your face. Here's how you can create a knot;
Instructions:
Step 1: Prepare Your Hair
Begin with either dry hair or slightly unwashed hair from the previous day. Having hair helps the bun stay in place better.
Step 2: Gather Your Hair
Bend forward. Gather all of your hair at the crown of your head as if you were making a ponytail.
Step 3: Secure the Hair
With one hand hold the gathered hair. Twist it to form a rope structure.
After twisting coil the twisted hair, around the base of the ponytail to form a bun.
Step 4: Secure the Bun
Continue twisting your hair until you form a bun. You can choose how tight or loose you want it to be.
Hold the bun in place with one hand. Use a hair tie, with the hand to secure it. Make sure the elastic keeps the bun firmly in place.
Step 5: Tidy Up the Bun
Use your fingers to adjust and arrange the bun as desired. You can pull on the sides of the bun to add volume and give it a look.
Secure any sections. Prevent unraveling by inserting bobby pins, around the bun.
Step 7: Finishing Touches
If you have any strands of hair framing your face you can leave them loose for an appearance. Pin them back for a neater look.
Optionally you can use a light-hold hairspray to set your style and keep any hairs in check.
Step 8: Half Top Knot Variation
For an effortless look try creating a half-top knot. Of gathering all of your hair gather the hair from the crown of your head and create a smaller bun.
Step 9: Messy Variation of a Top Knot
To achieve a laid-back and undone appearance gently gather your hair. Create a bun with a relaxed and less structured approach. Let a few strands escape the bun for a look.
The top knot is a hairstyle that can be personalized to match your style and the occasion. Whether you prefer a refined bun or a casual and messy appearance the top knot offers a fast and fashionable option to experiment with.
Fishtail Braid
The fishtail braid is a braiding technique that creates texture and intricacy. It's an attention-grabbing hairstyle, for occasions ranging from casual outings to formal events. Here's how you can create your fishtail braid;
Instructions:
Step 1: Prepare Your Hair
Begin with dry hair. If your hair tends to be slippery consider using some texturizing spray or dry shampoo for added grip.
Step 2: Divide Your Hair into Sections
Brush your hair thoroughly to eliminate any knots or tangles.
Divide your hair into two sections. You can. Gather all of your hair into a ponytail before dividing it or simply hold the two sections separately in your hands.
Step 3: Lets start braiding
Hold the two sections of hair in your hands.
Take a strand of hair from the edge of the left section and cross it over adding it to the right section.
Next take a strand of hair from the edge of the right section and cross it over incorporating it into the left section.
Continue alternating between left and right crossing strands of hair over, to the side.
Step 4: Keep braiding
As you continue braiding you'll notice that a fishtail pattern is forming. The crossed strands of hair will create a series of "V" shapes, along the braid.
Step 5: Add hair
Keep adding strands of hair from each side as you continue braiding downwards. Make sure to keep these sections small to achieve a fishtail effect.
Step 6: Braid until done
Maintain this alternating pattern until you've successfully braided your hair length.
Securely tie off the end of your braid using a band.
Step 7: Loosen up (Optional)
pull on sections of your braid to loosen it up and create a more voluminous and textured appearance.
This is a technique if you want a voluminous fishtail braid.
Step 8: Touches
If you prefer you can use a hairspray to set the style and prevent any loose strands.
You can also gently pull out face-framing strands to soften the look and create a relaxed vibe.
Remember practice makes perfect when it comes to fishtail braids. The more you do them the better you'll get at achieving a well-defined pattern. Feel free to experiment with sizes and levels of tightness to find the fishtail braid that suits your style.
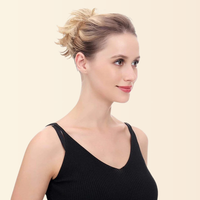
Twist Pigtails
Twisted pigtails are a playful twist, on pigtails. This hairstyle involves twisting sections of hair before securing them into pigtails giving a touch to an appearance. Here's how you can create pigtails;
Instructions
Step 1: Prepare Your Hair
Start by making sure your hair is clean and dry. You can add some texturizing spray or mousse for grip and volume.
Step 2: Divide Hair into Sections
Using a comb create a part, down the middle of your head dividing your hair into two sections; left and right.
Step 3: Begin by selecting either the right section of your hair.
Take a portion, near the front of that chosen section.
Split this portion into two parts and twist them away from your face intertwining them together.
While twisting gradually incorporate hair from the section into each twisted strand. This will result in a rope appearance.
Continue twisting and adding hair until you reach the back of your neck.
Step 4: Secure the segment
Once you have completed twisting the entire section fasten it with a small elastic band, at the back of your neck to create the initial twisted pigtail.
Step 5: Repeat the process
Repeat the twisting procedure on the section of your hair to form a twisted pigtail.
Step 6: Finishing touches
Gently pull on both twists to add volume and dimension allowing them to become more prominent.
If preferred take a portion of hair from each pigtail. Wrap it around the elastic bands to conceal them and achieve a polished appearance.
Optionally use a light hold hairspray to set the style in place and prevent any hairs
Step 7: Optional. Add Some Accessories
If you want to give your look a whimsical touch consider adding hair accessories, like colorful clips, ribbons, or even tiny bows to the ends of your pigtails. Twisted pigtails offer a fun and stylish twist to the style injecting creativity into your hairstyle. They're perfect for occasions whether it's an outing or a festive event. Feel free to experiment with twisting techniques and placements to achieve the desired effect.
Up Braid Crown
The up-braided crown is an exquisite and elegant hairstyle that combines the charm of a half-up style with the allure of a braided crown. It results in a whimsical look. Here's how you can create this captivating up-braided crown;
Instructions
Step 1: Prepare Your Hair
Begin with dry hair. For added grip and volume, you may opt to apply some texturizing spray or mousse.
Step 2: Divide Your Hair
Create a part in your hair according to your preference—a center part or a side part works well.
Divide the section of your hair—starting from the hairline all the way up, to the crown—into two equal halves; left and right.
Step 3: Start by selecting either the right side
Take a portion of hair, near the front of that side.
Divide this section into three parts and begin braiding by crossing the side strands over the center strand.
While braiding, incorporate hair from the top of your head into each strand before crossing them over. This will give you a braid effect.
Continue braiding until you reach the back of your head above your ear.
Temporarily secure the braid using a hair
Step 4: Repeat for the Second Braid
Repeat the braiding process on the side to create another braid. Ensure that both braids are similar in size and positioned evenly on your head.
Step 5: Create a Crown
Once both braids are done, cross them over at the back of your head to form a braided crown.
Secure the braids in place using pins. Tuck any loose ends, under their braid. Pin them down.
Step 6: Secure and Adjust
Use bobby pins to secure any sections and ensure that the braided crown is sitting securely on your head.
Step 7: Perfecting the Look
If you'd like, gently tug, at the sides of the braids to give them volume and texture.
Apply a light-hold hairspray to keep your style in place and prevent any fly aways.
Step 8: Touches
For a finish take a small section of hair from each braid and wrap it around the elastic bands that hold the braids together. This will help conceal the bands and create an appearance.
The up-braided crown is a hairstyle that is ideal for weddings, proms or any special occasion. It's a look that can be tailored to suit your preferences and hair length. Experiment with braiding techniques and positions to achieve your desired outcome.
Space Buns
Space buns are a fun hairstyle where you create two buns on top of your head of astronauts "buns" in space. This hairstyle can be dressed up or down making it particularly popular, for festivals, parties, and creative looks. Here's how you can achieve space buns;
Instructions
Step 1: Prepare Your Hair
Begin with hair.
If your hair is too slippery you can enhance its grip by using texturizing spray or dry shampoo.
Step 2: Sectioning the Hair
Start by parting your hair. You can opt for a part, a part, or even a zigzag part to achieve a more playful look.
Divide your hair into two parts; left and right.
Step 3: Creating the First Space Bun
Begin with one of the sections (left or right). Gather all the hair from that section. Create a ponytail on the crown of your head.
Secure the ponytail in place, with a hair
Step 4: Twisting and Coiling
Twist the ponytail tightly to form a rope twist of hair.
Coil the ponytail, around its base to create a bun. Continue coiling until you achieve the desired bun shape.
Step 5: Securing the First Bun
Use bobby pins to secure the bun in place. Insert them around the base of the bun to ensure it stays put.
Step 6: Replicating for the Second Space Bun
Repeat these steps on the section of hair to create another space bun.
Make sure the buns, on your head are similar in size and positioned evenly.
Step 7: Adjust and Fine Tune
Gently pull on the sides of the buns to make them look bigger and more voluminous if you wish.
You can also take out a few strands of hair around your face or shorter layers to soften the appearance and add a touch of playfulness.
Step 8: Touches
Apply a light-hold hairspray to set the style and prevent any hairs from flying away.
If you like you can also include accessories like glitter, hair clips or ribbons to enhance the feel of the space buns.
Space buns are about having fun and expressing your creativity. Feel free to experiment with sizes, tightness, and placement of the buns to achieve a look that matches your style.
Conclusion
Doing hairstyles for your girl can be an imaginative way to create a bond with her and make her feel special. From braids to pigtails and space buns there is a wide range of hairstyles to choose from. With some patience and practice, you can accomplish any of these 10 girl hairstyles making your little one feel like a true princess.
Leave a comment
All comments are moderated before being published.
This site is protected by hCaptcha and the hCaptcha Privacy Policy and Terms of Service apply.