
Hair buns have been around for a long time. This hairstyle has a magnetic pull and tends to appear appealing regardless of how you choose to wear it, whether it's a perfectly untidy top knot or an immaculate braided up-do. Short or medium-length hair buns, on the other hand, can be difficult to achieve. People with hair extensions, on the other hand, have unlimited styling freedom because the added length and volume from extensions allow them to experiment with a variety of bun designs.
Many young ladies adore the bun hairdo. However, not every girl has hair that is long and thick enough to make a bun. Hair extensions are, therefore, the best option for you. The varieties of hair extensions that are appropriate for bun hairstyles are discussed in the following article. We'll walk you through how to make a bun with juvabun hair extensions. Prepare to flaunt your new hairstyle's extra volume and pizazz.
How to Make The Perfect Straight Bun Using a Straight Bun Hair Extension

You're pressed for time, but you still want to look great? You do, of course! This quick and easy low bun was spotted on the runways of London Fashion Week and is expected to be popular this fall and winter. It screams easy Parisian chic from every angle. For serious strutting down the Champs Elysées' style, pair it with minimal make-up, a great purse, and your most careless stare. As always, we're here to show you how to achieve the look – and believe us when we say that this hairstyle is essential that every female should have in her arsenal! Begin by gathering everything you'll need…
You'll require
- Your hair extensions (clip-in)
- Hairbrush
- A sectioning and backcombing comb
- A headband
- Clips or grips for hair
Step 1: Clip in Your Hair Extensions

First and foremost, you must clip in your hair extensions. It won't take long because you won't need many wefts - just enough to add length and substance to your hair. Applying your extensions is what elevates this easy look, giving you a fuller and more attractive low bun.
Apply a two-clip weft to a portion at the bottom of your head. Then construct a new segment above it and weft it with four clips. That's it — super simple, right?
Are you new to the world of clip-in hair extensions? Are you unsure where to begin? Or are you just searching for a change of pace and want to see how other women do it? Because, after all, we're all inquisitive, right?
We'll show you how to get started with clip-in hair extensions in this article. We've got you covered on everything from sectioning and teasing to stacking and arranging your wefts. So, first and foremost, gather all of your necessary equipment.

You'll need the following items:
- Clip-in hair extensions (you won't be able to get very far without them!)
- A sectioning comb with a long, narrow tail (but a blunt pencil will also do the trick just fine)
- Clips or bobbles to keep your portions in place
- Hairspray
- A fine-tooth comb or a backcombing/teasing brush.
- Two mirrors, one on each side of your head, so you can see the back of your head.
You're ready to start dividing your hair into pieces once you've gathered your supplies.
The Steps to Put in Extensions
- Sectioning
Starting at the bottom and working your way up to the top of your head is the most efficient method, so the first part you'll need to build will be at the nape of your neck. Here's where your strategically placed mirrors come into help. Starting approximately an inch above where your hair ends at the nape of your neck, "draw" a line across the back of your head with your tail comb (or pencil tip), scooping up the hair above the line as you go and fixing it on top of your head with a clip or bobble. Your first part is the hair that is left below. Wasn't that simple?

- Teasing
It's now time to tease. If you have thick, coarse, or curly hair, you may be able to skip this step, but if you have any other hair type, this step is critical since it provides something for the clips to grab. Simply hold the hair in one hand, set your comb or teasing brush about an inch or two from the root, and comb towards the scalp a few times to tease the initial section. Do this all the way along the segment you've created, then spray with hairspray.
- Stacking your wefts
It's tempting to keep adding wefts higher and higher up the head while trying to fit all of your wefts on your head. However, you run the danger of not having enough hair on top to cover the uppermost wefts. If you're having trouble with this, stacking your wefts will make things a lot easier. To "stack your wefts," just clip two wefts together and apply them together as if they were a single weft. Simply clip two wefts of the same width to each other to do this. This provides you the thickness of two wefts while only taking up one weft's scalp area.
- Clipping your wefts in
Simply clip your first weft (or stacked weft if you've been practicing witchcraft) into the teased roots of your first section. That's right, and it's that simple. You could definitely get your obnoxious little cousin or a monkey to do it for you. Yeah, I'd prefer the monkey as well.

-
And then do it again.
Simply continue the technique, spacing the portions about an inch or two apart until you reach the place just below your temples. We could walk you through it, but saying stuff like "clip one of the one clip wefts around one inch back from the hairline at your temples" is going to be perplexing!
Step 2: Don’t Forget to Prep Your Hair
Prepare your hair by brushing any knots or tangles out with your hairbrush before creating your low bun. Then, to produce a center parting, trace a line up from the point of your nose. After that, backcomb your hair towards the crown of your head slightly to add volume. Très Bien, you're now ready to make your low bun.
Step 3: Create The Bun
Pull your hair back into a low ponytail at the nape of your neck, which will be the location of your bun. Don't stress about keeping it perfectly smooth and tight; we're trying for a laid-back vibe here, so no scraped-back ballerina hair! Pull your ponytail halfway through the hairband with your hairband. Then, to make your bun, pull the end of your ponytail back into the band.

Step 4: Finishing the Look
Pull-on your bun a little to make it bigger and more voluminous, which will help it look its finest. Pull the hair above your bun a little looser to contribute to the look's laid-back vibe. Take your hair grips and secure your bun in place with them to keep it in place. You can even tease a few strands of hair off the front of your head to frame your face if you want.
Take a look at our list of some of the best bun hairstyles to try with hair extensions.
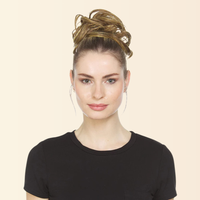
1. THE LOW KNOT
This is the simplest bun hairstyle you can do in a matter of minutes. Begin by smoothing your hair with a smoothing serum. Once the serum is uniformly distributed, pull your hair back into a low ponytail an inch above your nape of the neck. After that, twist the ponytail into a bun and bobby pin the ends together.
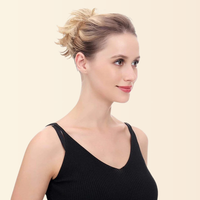
2. THE CHIGNON WITH THE WET APPEARANCE
The chignon is one of the most fashionable hairstyles, suitable for both formal and informal occasions. Begin by combing a generous amount of hair gel or glossing spray of your choice through your hair for a moist effect. Then, at the nape of your neck, gather your hair and put it in a ponytail. Split the ponytail in half and tie the two halves together in a knot. You're set to go once you've pinned any loose ends underneath the bun.

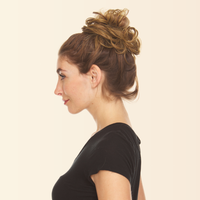
3. THE TOP KNOT BRAIDED
Since this keeps hair out of your face, this braided bun is perfect for festivals and outdoor celebrations. After applying a smoothing serum to your hair, tie it up in a high ponytail. After that, braid your ponytail using the standard three-strand method. Wrap the braided hair around the elastic to produce a high bun once it's finished braiding. With pins, secure the ends.
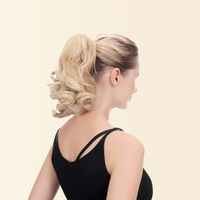
4. THE SIDE BUN WITH BRAID
This exquisite hairdo is better suited for formal occasions such as weddings or proms. Begin braiding your hair on the side and work your way to the other end by braiding diagonally. Secure the braid with elastic, then wrap the leftover hair around your ear to produce a low-side bun.
Why You Should Use Hair Extensions For Bun Hairstyle

Hair extensions are one of the quickest and most effective ways to transform your hairdo.
- Applying hair extensions will not take long. Permanent hair extensions, with the exception of specific varieties such as weft hair extensions and hair extension beads, will take a long time to apply in general. These varieties of hair, on the other hand, frequently adhere to genuine hair pretty well. When it comes to creating a bun hairstyle, hair extensions are always the first choice.
- Hair extensions can help you add thickness and length to your hair based on your preferences. As a result, the hair extensions are simple to adapt to the desired length and thickness. You may also readily find hair extensions for bun hairstyles as a result of this.
- Hair extensions also come in a variety of styles, from curly to wavy to straight, and in a variety of colors, including all of the colors you requested, as well as ombre and piano colors. Hair extensions, in general, can suit your needs in constructing a bun for as long as you wish.

How to Keep Your Extensions Last Longer
- Sleep on silk or satin.To keep your hair extensions from drying out while you sleep, wrap them in silk or sleep on a silk pillowcase. Before getting a good night's sleep, you can quickly discover how to prepare your extensions. Brush the region where the extensions are linked to your own hair gently with a small soft bristle brush (near the roots). Tie a silk scarf around your head's circumference, then tie it from the back and knot it at your forehead area to retain your hair in the same direction.
- Replace extensions regularly.Even with the best care, you won't be able to keep wearing the same extensions indefinitely. With good care and regular visits to your hairstylist, a sew-in can last up to two to three months, according to Porsche. Because your hair has grown out so much, you'll know it's time for your hair to come out when your installation is entirely visible.
- Don't use too many products. More isn't always better, and if you're a product hoarder, this is the one for you. The product is fine... if you know how to use it. If your extensions are straight or silky and non-synthetic, it's recommended not to apply much product throughout the style because it's already straight, and straight hair tends to last longer. Only a heat protectant, dry shampoo, or shine spray should be used. Go forth and add those inches, honey, now that you know how to care for your extensions.

Key Takeaways!
Hair extensions will give you a wonderful look and feel similar to long natural hair. If you meet strangers or go to a social function, no one will know you've used hair extensions. It offers a plethora of unique designs for various occasions, and hair extensions make getting a bigger braid or bun a breeze. You will notice that you seem more appealing after wearing it than you did before, especially if you have more hair or a longer hairdo. Hair extensions are the finest solution if you want to appear amazing in a couple of minutes.
Leave a comment
This site is protected by hCaptcha and the hCaptcha Privacy Policy and Terms of Service apply.