
A fantastic collection of bun hairstyles for ladies, as well as a chart illustrating the many forms of hair buns. In a large series of photographs, there are examples of loose, low, high, and braided buns.
This is the ultimate gallery of bun styles, which you may sort by hair color, face type, and other factors. The bun is a timeless hairstyle for both men and women. You can make a variety of styles, including low, high, braided, double, and more. They keep your hair off of your face and are more sophisticated than a basic ponytail.
Buns can be edgy, conservative yet modern, classic, or vintage-inspired, depending on your outfit's style and personal preference. These sorts of hair buns are used to produce the most popular bun hairstyles:
- Low buns: These buns are worn at the nape of the neck and can be sloppy or sleek in appearance. The low bun hairstyle is frequently elevated with bouffants, twists, braids flowing into a bun, or well-chosen accessories.
- Top knots: Whether it's a high knotted, untidy, or cornrow bun, the aim is to place the bun on top of the head for maximum exposure. Updos with high buns can be quite eye-catching and help to lengthen the face.
- Side buns: Side buns have the elegance of low buns, but they don't require an introduction because they're seen from the front. These are probably among the nicest sorts of buns to try because they are versatile and flirtatious.
- Braided buns: Braided buns are produced by twisting hair into a bun after it has been braided. It can be as basic as twisting a braided ponytail or as complex as making a seashell with the side fishtail braid.
- Chignon buns: Inspired by a French twist, chignon bun hairstyles exude flair and elegance. An excellent pick for a formal occasion!
Half-up buns, pigtail buns, space buns, and Bantu knots are all in vogue right now. These are the bun hairstyles that offer your hair a delightful twist, whether you're going to a festival or just want to celebrate youth and joy in the midst of your daily routine.
Hairstyles for Long Hair
The Traditional Updo
The bun is the most adaptable hairdo that has ever existed! Any occasion, event, attire, mood, season, or personality can be paired with a bun. Bun hairstyles for long hair are a blessing from the gods. Simply tie your long, flowing locks in a top-knot or low bun and go about your business at work or at home. Continue reading to learn how to style your hair in a bun so that your top-knot or low bun appears fresh at all times. Let's get started!
What you Need!
- Comb
- Curling iron
- Barrette
- Hairspray
- Bobby pins
How to Make The Bun

- Make loose curls in your hair.
- collect all of your hair into a low-side bun.
- You can use a bun maker to make your hair look thicker if you have thin hair.
- Pin the bun in place using bobby pins.
- Let a few strands of hair hang freely. Curl these strands to give the hairstyle a romantic feel.
- Add a barrette and hairspray to finish.
Achieving a Pouf Bun
What You Need
- Hair clips
- Brush
- Curling iron
- Elastic band
- Bobby pins
How to Make It

- Make a horizontal part in your hair from ear to ear.
- To remove any knots, clip up the top part of your hair and brush down the bottom half.
- Make a low bun using the lower part, allowing the ends to hang over the bun.
- Use an elastic band and bobby pins to secure it in place. If you wish to make your hair look more dramatic, curl it.
- Remove the top piece of the clip.
- Pull a strand of hair from the front of your head and leave it out.
- To make a pouf, gather the rest of your hair and back-comb it.
- Pin the pouf in place with bobby pins.
- Pin the hair in the back after brushing it back from the front.
Braided Crown
What You Need
- Bobby pins
- Elastic bands
- Accessories

How to Do It
- Braid your hair at the sides using the waterfall braiding method. Elastic bands or bobby pins can be used to keep the braids in place.
- Make a messy bun with all of your hair.
- Add a boho vibe to the appearance by accessorizing with flowers or beads.
On sweltering summer days, who doesn't want to wear casual braided updos? This crown braid is the ideal way to look majestic while staying cool. Make it a little sloppy for a less formal look. It looks great on a variety of hair lengths and can be worn with any texture.
Modern French Twist
When it comes to hairstyle inspiration, it's often best not to reinvent the wheel—just add some gleaming rims.
This is exactly what hairstylists and influencers had in mind when they put a new spin on one of the most popular updo hairstyles: the French twist. This hairdo, often known as the French roll, has been seen at several weddings, proms, and other significant events. It's a classic that we keep coming back to because of its variety and ease of execution. And we're particularly fond of its 4.0 edition these days for truly Instagrammable occasions. Check out three of our favorite ways to modernize the classic French twist with only a few minor tweaks.

1. Make It a Complete Mess
When it comes to modernizing your favorite 90s-inspired French twist, we recommend getting a little messy. Combining the sensual bedhead look with the polished look of the traditional French twist gives it a modern edge that can be worn on a daily basis or for a special occasion. To achieve the look, simply follow these simple instructions.
Step 1: For a hint of softness and shine, start with clean hair. Give your strands a fast cleanse and conditioning. After that, brush your hair to remove any knots.
Step 2: Skip the hairspray and move right to building your updo because this version of the style has a sloppy feel.
Step 3: To make it more disheveled, tousle some of the hair. To produce flyaways, pull some hairline pieces out or rub your hands against the grain of the hair after pinning the French twist.
2. Twist It Twice
Another method to modernize your French twist is to give it a literal twist! Giving the style a second twist not only adds dimension, but it's also a terrific method to add structure to poofy, thick hair or make thin hair look fuller. Do you want to copy the look? To achieve this look at home, follow the steps below.
Step 1: Start by adding hair to your strands to help manage frizz and static if you have thicker hair. Give your hair a burst of volume if it's on the thin side. Spray straight on the roots to remove grease and grime that can weigh your hair down.
Step 2: Because you're making two, you can make your twists using the palm method. Divide your hair into two sections (clip one side while you work on the first one). Gather your hair in one hand and place the other hand flat against your head, palm up, to grab it. Then wrap the hair around your open palm and grab it with your open palm while twisting it up. Before continuing on to the opposite side, secure your fresh twist with bobby pins. Whether you need to pin and tuck the remaining length under your twist depends on the length of your hair.
Step 3: Before spritzing with hairspray for a long-lasting hold, add any barrettes or other ornaments you want to embellish your double French twists.

3. Add Some Braids
Braids are the perfect accent for this style, whether you're wearing your favorite knotless box braids and want to add a French twist, or you're making new plaits to add some flair to your 'do. It's a simple method to give your protective style a fresh lease on life without having to return to the braider's chair. Simply follow the basic French twist tutorial or do a single-palm method twist and fix with pins if you have braids all over. Do you only want to add a few braids to your roll? Here's how you can achieve the look.
Step 1: Create three separate braids two inches apart on one side of your hair before beginning your French twists. Remember that these braids should be visible on the outer layer of hair, so make them about an inch wide. To give your braids some hold and keep flyaways at bay, use a little style gel.
Step 2: To make your twists, grab your hair with one hand and place the other flat on your head with the palm facing out, using the palm method. Grab your hair with your open palm and twist it up into a voluminous roll, which you can fix with bobby pins.
Step 3: Using more bobby pins, if necessary, tuck your lengths under the twist.

Gilded bun
What You Need
- Mousse
- Comb
- Elastic band
- Bobby pins
How To Do it
- Apply some mild mousse to your comb.
- Gather all of your hair and use the moussed comb to smooth it down. This will maintain your hairdo in place for a long period while also making it sleek and shine.
- Gather the rest of your hair into a bun, leaving a little hair on both sides. It's held in place with bobby pins and an elastic band.
- Wrap the side portions around the bun and overlap them.
- Pin them in place with bobby pins.

If you have long, lovely hair, you can experiment with a variety of hairstyles. The bun is a flexible and timeless hairdo. It looks well on all hair types and gives you a lovely feminine look. This haircut goes with a variety of outfits and circumstances. Popular bun hairstyles for long hair include the stunning updo, pouf bun, braided crown, gliding bun, and braided base buns. Additionally, apply the appropriate hair accessories, such as flowers or jewelry to complete the look.
Medium Hair Styles
Because some hairstyles appear better on longer lengths, a medium length may limit the variety of hairstyles available.
With shoulder-grazing hair, though, you can afford a plethora of exquisite updos that will never reveal your true length. Updo hairstyles are a must-have for hot summer days when you need to keep your hair off your face and somewhat ordered. Furthermore, every formal occasion necessitates an exquisite 'do preferably pulled up. Whether you're looking for new ideas for casual outfits or formal updos for shoulder-length hair, you'll find both here. So, spend a few minutes seeing what we've discovered on the subject. What are the best medium-length updos? Obviously, it depends on the situation. However, we may compile a list of the most popular mid-length hairstyles and construct a sort of overview on the subject. Buns, basic knots and French knots, braided updos, and up hairstyles with tucked ends are just a few examples. Continue reading for a more in-depth analysis.

Best Updos for Medium Length Hair
- Buns. A bun is perhaps the most simple updo you can achieve on your own. You may lack a body with medium-length hair that isn't thick enough, which will eventually affect the size of the bun. Backcombing adds body to the bun and makes it appear larger.
- Knots. Modern knots are clumsy and untidy. Make a low or high "imperfect" knot by teasing your hair at the roots to add some lift around your face. You can build loops by pulling at random strands once it's finished and fixed. Don't forget that intentionally unkempt looks are currently in vogue.
- Braids. These days, a casual updo without a braid is rare. Braids are quite welcome in current updos, whether it's a massive crown braid or a tight tiny braid on one side to accent a bun.
- Styles with several components. We don't always wish to keep things simple. Multi-component hairstyles, such as twists and curls, a braid and a bun, a braid and a knot, and so on, provide the most elegant hairstyle ideas. You can also come up with your own style by borrowing inspiration from the suggestions below.

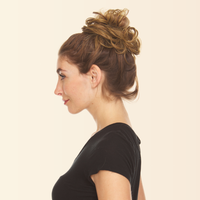
Chunky Braid Updo
Casual updos are also possible. Take, for example, a french braid. French braid hairstyles are timeless classics that are ideal for a variety of circumstances. French braids, fishtails, and Dutch braids will go with and enhance any attire, from formal evening events and weddings to casual days around town. All you have to do now is learn a few braiding techniques and be creative.
The excessive weaving looks smooth and sleek. Even though it's a more casual look, it's appropriate for everything from breakfast with the girlfriends to work days. For a formal event, dress it up with accessories.
How to Get The Best Chunky Braid Updo?
This simple braided bun hairstyle technique will give you a stylish updo in no time. The key is to make a chunky braid.
One of my go-to styles is the braid that produces this bun. This is a thick braid with only three extra pieces rather than an extensive and complicated braid. Start with a large chunk of your hair and divide it into three equal parts.
Wet hair is ideal for this style of thick braid. This thick braid is easy to arrange and will create gorgeous waves in your hair as it dries, rather than becoming tangled with wet hair.

What You Need:
- Small hair elastic
- Bobby pins
Step-by-Step Tutorial
- Make this braid as wide as possible. Split a huge chunk of hair from the top of your head into three sections.
- Braid your hair down the back of your head in a Dutch braid. A Dutch braid, often known as an inside-out braid, is the inverse of a French braid. Cross the left section under the middle part, then the right section under the left section.
- In three pieces, add the rest of your hair to the braid. This is a giant chunky braid, not a little braid with a lot of pieces. Add a third of the rest of your hair to the next part crossing beneath. Continue braiding the next two parts until all of your hair is in the braid. Continue in a regular braid and use an elastic to fasten the end of your hair.
- To construct the bun, curl the end of your braid around. To keep the braid in place, tuck the ends of your hair in and pin it around the braid's edges.

Styling Tips
- Instead of a bun, you might wear this simple braid. For my everyday hair, it's one of my favorite easy braids. Because you add your hair in three portions, it's significantly faster.
- Stretch out your braid before making the bun if you have fine hair. To widen your braid and make your hair look thicker, gently pull at the sides.
- Always use clear elastic or one that is the same color as your hair. My hair band is still visible below, but it blends in with my hair and is hidden in the finished style. It will stand out if you choose a thick or brightly colored elastic.
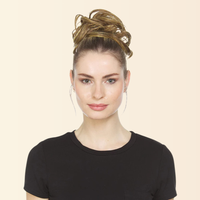
Blonde Bouffant Up-Do
Because the strands are thinner than typical, fine hair can look excessively flat in updo hairstyles. The scalp can sometimes be seen peeking through, especially with light-colored hair. To counteract this, use a large bouffant to add height to the crown.
Bun styles don't have to be boring! If you're tired of your usual sleek bun and top-knot, here's a haircut that can help you break free. A bouffant bun is what we're talking about! This modernized version of your classic bun will look great with both vivid flowery gowns and exquisite gowns.

All you are required to do is follow the step-by-step guide below to ace this super chic hairdo:
Step 1: (Work this hairstyle on second or third-day hair) Begin by using a wide-tooth comb to comb your hair. Before you begin the bun style, make sure there are no knots or tangles in your hair.
Step 2: To section your hair, either use your finger or a rat-tail comb. Simply place a finger or comb at your ear and draw a vertical line from one ear to the other, sectioning off the front hair.
Step 3: Finish by clipping the front part. Begin by working with the back-of-the-head portion of hair. Pull the remaining of your hair into a ponytail or a juva bun and place it high on your head.
Step 4: Create a sloppy bun by wrapping the ponytail around itself. Use a hair tie to keep it in place.
Step 5: Unclip the front piece of your hair, divide it into two sections, and then divide it again into two sections, leaving you with four quarters.
Step 6: Wrap one of your bottom quarters under and over the bun, back-combing it. Using a bobby pin, secure the hair. Carry on with the other bottom quarter in the same manner.
Step 7: Tease one of your top quarters and smooth it diagonally over your head, then repeat the process. Using a bobby pin, secure the hair. Carry on with the last top quarter in the same manner.
Step 8: To make it look like a bouffant bun, finish with some texturizing spray and tug at the front area.

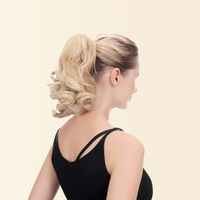
French Roll Bun
Thanks to formal hairstyles like this one, beautiful updos with shoulder-length hair aren't hard to come by. Even without extensions, the French Roll will help your thin hair stand out and look even more lovely than it really is! To soften the look, loosen a few strands around the face.
How Do You Achieve This Look?
You've finally gotten some time off work and can't wait to spend it with your significant other on a date night. Your dress, shoes, and makeup are all in place, but you're stumped on what to do with your hair. But you can't spend another hour in the salon to get it done—which is where this elegant French twist comes in handy. Follow our step-by-step instructions and have two pencils on hand... In no time, you'll have date-ready hair!
You Will Need Pencils
Step 1: Tie your hair in a ponytail and run a pencil vertically through the middle.
Step 2: Then, along the same line as the first pencil, add a second pencil.
Step 3: Remove the rubber band and, while holding the two pencils, slide the hair outwards.
Step 4: Using bobby pins and U-pins, hold the bun in place by rolling the hair inwards (towards your scalp).
Step 5: Gently remove the pencils after you've secured the bun.
There you have it!

Hairstyles You Can Rock with Short Hair
It may appear that folks with short hair are denied the same styling options as those with lengthy, healthy locks. There is a slew of ponytails, braids, and buns made specifically for long-haired girls. But what if you have short hair and want to try one of these trendy looks?
Pros of Short Hair Buns
It may be more difficult in some circumstances (depending on hair length), but even with short hair, there are cute and trendy techniques to construct a bun. Buns for short hair can range from current and edgy to traditional and chic, depending on the look you're going for.
One of the finest things about wearing a bun is that it is a fantastic alternative to a ponytail. You don't have to worry about having enough hair to fill out a bun for a short length like you would with a ponytail. So relax and enjoy some of the best short bun hairstyles available online!

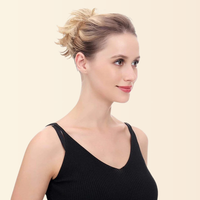
Wispy Bun-like Updo
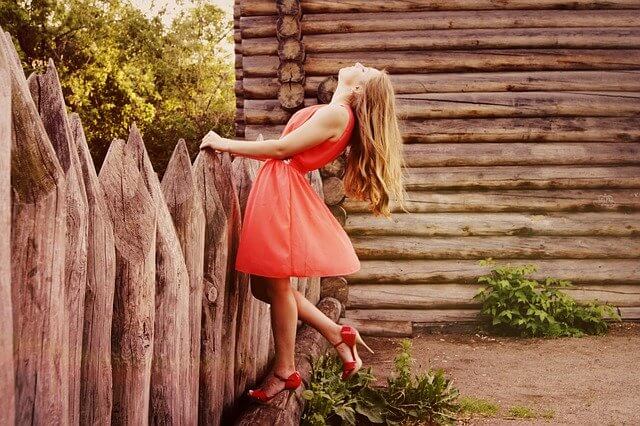
This wispy hair bun is incredibly lovely, adding a welcome touch of sophisticated romanticism. The wisps of hair escaping from each side add some drama and a sensual vibe. Skilled hands can create this low updo in a matter of minutes.
Meghan Markle has been spotted with a wispy low-bun that is super chic and modern since she first entered the royal scene. If the newly minted Duchess of Sussex has shown us anything, it's that said hairstyle can be worn anywhere from a simple stroll with your sweetheart to the royal wedding to, you know, that 6 a.m. Pilates class.
Its adaptability stems from the fact that it's quite easy to execute, and you've probably been doing it for a long time—no? Furthermore, you may switch up the knot by moving it from the top to the nape of your neck, all while maintaining the hairstyle's laid-back framework.
How to Get This Look?
Begin with a new or slightly worn-in blowout or gentle, natural waves with smooth ends. This works nicely since the parts that come out will appear soft and wispy rather than crunchy when you twist your hair up. Then, from the roots to the very tips of the ends, run some product through the hair to keep the look in place and ensure the ends stay wispy and not frizzy.

Once your hair is ready, pull it back into a ponytail and secure it with a clear elastic, which will provide a solid foundation for your look. Begin twirling the pony into a bun, leaving the ends loose to add to the wispy appearance. Untuck face-framing pieces to finish it off, and if you don't have them, visit your stylist ASAP since a wispy bun is nothing without soft pieces around the face.
Where to Wear This Look?
From pool parties and backyard barbecues to showers and weddings, this basic yet elegant style will be the trend for all types of events this summer. The wispy bun is a little more sophisticated than a messy bun and a little more relaxed than the classic bun. It takes a little more effort to produce but is well worth it.
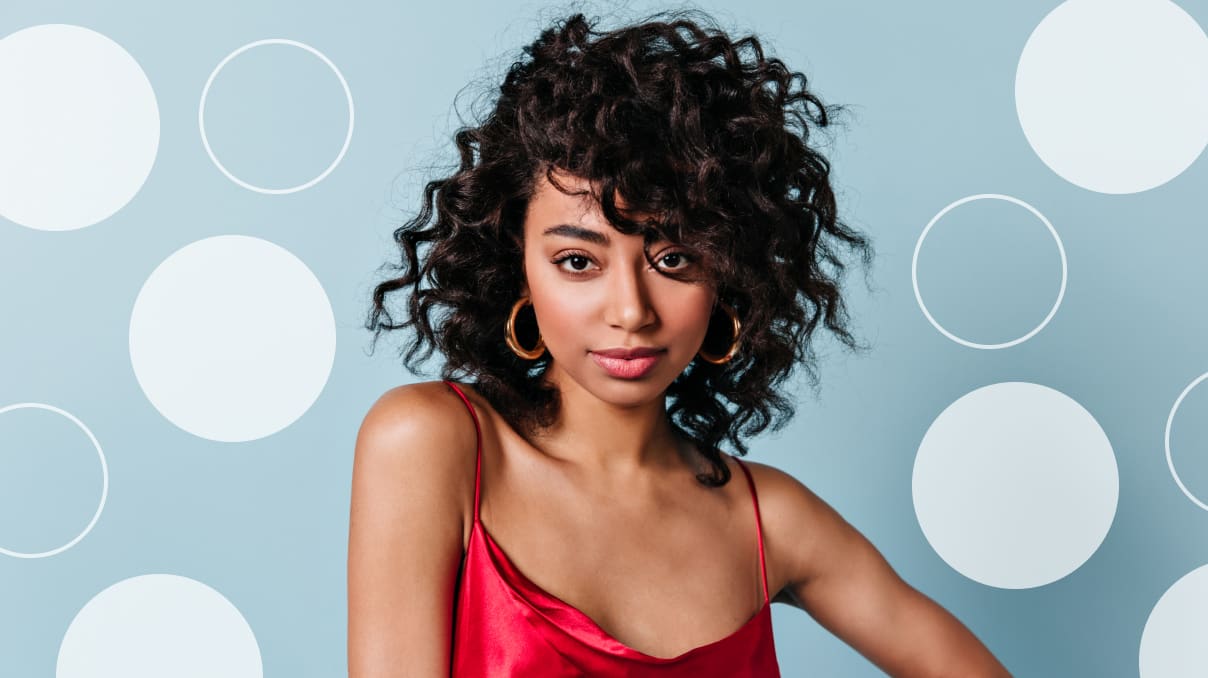
Curly Bun With Hair Flowers
It's incredible what a good hair item can do for a hairdo. Buns with short hair frequently require a little bit extra to stand out, and a single white floral accent is the ideal complement.
Curly buns come in a variety of styles and are a cute and stylish look. Particular twisting buns, on the other hand, function better with certain hair types. When straight hair is twisted into a tight, sleek style, it looks fantastic. Curly hair, on the other hand, lends itself well to a loose, low, twisting bun due to its natural volume. Fortunately, both varieties are simple to perform at home.

A step-by-step guide on how to achieve the look
- Don't mess with your curl pattern. If you like your curls the way they are, be cautious when putting your hair up. Don't overstretch your hair by tying it up in a tight bun. The simplest approach to avoid harming your lovely curly locks is to draw your hair back gently when putting it up. Low buns are not only flattering on curly hair, but they're also more relaxed than a high top-knot or ballerina bun.
- Pull your hair back into a ponytail and place it where you want your bun to sit. For a low bun, this can be near the nape of your neck's center or a little higher than an average bun. With one hand, hold it in place while the other secures it with a hair tie.
- Form the primary bun by twisting your ponytail. Twist the ponytail into a loose coil with your fingers. Wrap the entire coil around the ponytail base gently. Using a bobby pin, secure it in place. To avoid harming your curls, remember to maintain them loose. Don't tangle it too much.
- Use a couple of bobby pins to keep everything in place. To keep the braid, the bun, and the bun's base in place, insert a few bobby pins through the braid, the bun, and the bun's base. The number of bobby pins you'll need is determined by the amount of hair you have to secure and how effectively your hair holds a style. Consider applying an anti-frizz hairspray if your hair is prone to frizzing.
- For a more refined look, add a braid. You'll need to split your hair before putting it up in a ponytail if you want to include a braid in your curly bun. Gather your hair into two pieces with both hands, one to the left and the other to the right. Assemble the correct section into a bun as usual. Make sure the left section of the braid is thick enough.
- Braid the left portion of the braid. Make a basic braid with the free hair that remains. Braid loosely to avoid damaging your curls or creating a braid that is too stiff to use as a wrap.
- Finish by wrapping your braid around your bun. Take your braid and drape it over the man bun to the right. In a clockwise direction, loop the bottom of the braid around the bun until the entire braid is wrapped around the bun. Finish by tucking the tail end of the braid underneath the bun if your braid is long enough to completely encircle it.

Small Low Bun With a Bouffant
In a low updo, thin hair can appear flat and limp. Before you pin your hair into this simple chignon, style it in loose curls to add volume. A bouffant adds volume to the entire crown.
What You Require
- Elastic band
- Bobby pin
- Hair spray
Chignon Bun How-To: Step-by-Step Tutorial
Step 1: Part your hair from ear to ear and section off the front half of your hair to utilize as a chignon wrap later. Make a sag-proof ponytail with the rest of your hair. Try out this easy trick. (An elastic with two bobby pins strung on it will suffice.) Make a ponytail with your hair and keep it in place with your hand. Pin one bobby pin in place, then wrap the elastic around the base of your pony a few times and secure it with another bobby pin.) Tighten the pony and make sure the strands above it are properly positioned.
Step 2: For extra volume, back-comb the pony strand by strand and spritz with a light-hold hairspray for brushable texture and greater grip. To smooth the hair, lightly comb it through the top. Make a basic loop out of your pony and secure it with an elastic band.
Step 3: Wrap the loosely hanging end around the pony's base; fan out the very end of the wrap and arrange it so that it covers the lopped pony's base beautifully. To keep the wrap in place, use pins.
Step 4: Now, work on the front area you skipped at the start. Divide the hair into two portions, tease the roots of each, and lightly brush through to smooth it out. Bring one portion to the chignon's base and wrap it around it. Pin the chignon to the side to keep it in place.
Step 5: Tie a little elastic around the middle of the area you're working on how to protect it from blending in with the rest of the wrap's strands. Wrap the thread around the chignon a few times and pin it in place if necessary. Allow one wind to be closer to the base and the other to be a little lower for a softer finish.
Step 6: Do the same thing with the other wrap part from the front. Pull the hair over the chignon gently to create a looser, slightly disheveled updo. You can even do a small bouffant, but don't go overboard.

Tips + Tricks to Make Your Hairstyle Last All Day?
When it comes to extending the life of a blowout or other hairdo, the cosmetics you use beforehand are just as crucial as the products you use afterward – and, for the most part, less is more. Anti-frizz serums and holding lotions may look great on day one, but by days two and three, your scalp will be oily, and your strands will be heavy and limp.
- Use Sea Salt Instead of Regular Hairspray. Sea salt may be too drying for newly washed hair, but it's a terrific hold solution if you're trying to prevent the oil a few days after washing.
- Use a hair dryer with ionizing technology that is of high quality. A long-lasting hairstyle starts with the styling and using a low-quality blow dryer not only damages your hair irreparably, but it also dries it out, leading your body to produce extra oil to compensate.
- Use Dry Shampoo in a Natural Way. Dry shampoo isn't a new tip for a long-lasting hairdo, but synthetic components disturb the pH of your scalp and promote build-up, making the problem worse. Whenever possible, look for organic options.
- Use Blotting Paper on Your Hair While on the Go, Oil blotting paper isn't just for your skin when you're on your way to work on the train. It's also an excellent way to maintain your hair appearing new.
- For a Long-Lasting Volume, Lift Your Roots. Lifting your hair away from your scalp prevents oil from spreading.
- Add apple cider vinegar to the mix. Some people overuse products in an attempt to make their hairstyle last longer, but this produces build-up in the hair, resulting in oily, flat, and limp strands. This apple cider vinegar and herb conditioning hair rinse is a terrific method to use apple cider vinegar to remove build-up, gently cleanse, and balance the pH of your scalp. It will wash and freshen your hair while encouraging shine, and the additional herbs will strengthen and add texture.

- To keep your bun in place, use bobby pins. Insert bobby pins in a criss-cross or X form for the most stable bun. The bobby pins can also be inserted into the hair elastic.
- Try the braided bun if you want your hair to stay wavy after your bun.
- Make sure your elastic bands are the same color as your hair so they don't stand out from the center of your bun.
- For a better hold, press the bumpy side of your Bobby pin against your head. Alternatively, before putting your Bobby pins in your hair, spritz them with hairspray.
- When putting your hair up, spray it with water to make it tighter.
- Use an elastic band to keep your hair in place and tight.
- Any of these styles can be done with wet or dry hair, curly or straight.
- As a hairspray, use detangling spray. It will make your hair less tangled at the end of the process.
- If your hair is layered, spiral curl the loose hair that escapes or is too short to put in the bun instead of forcing it to stay sleek against your head.
- To keep your bun in place, spritz it with hairspray.
Leave a comment
This site is protected by hCaptcha and the hCaptcha Privacy Policy and Terms of Service apply.