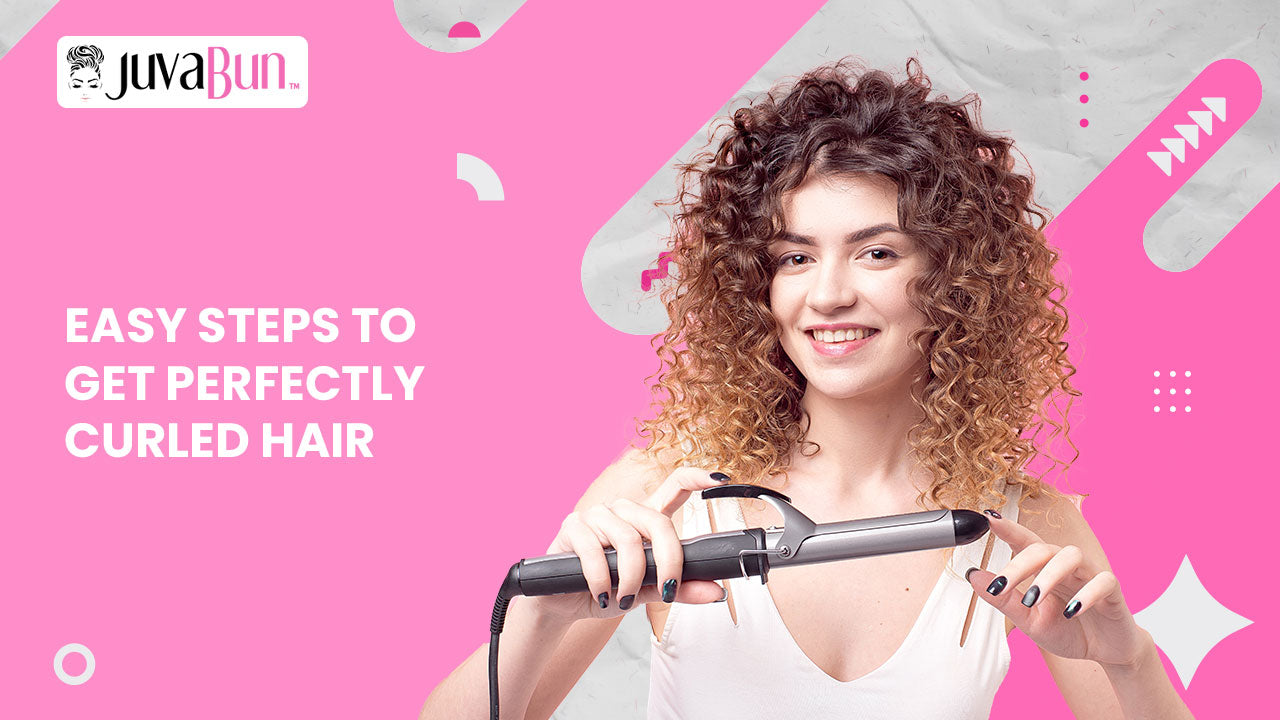
Having hair can add a touch of glamour to any style, which's why it's a popular choice, among many women. Whether you're aiming for a vibe or a more elegant hairstyle knowing the correct way to curl your hair can make a world of difference. In this blog post we'll share some tips and tricks for achieving lasting perfect curls.
Selecting the Right Curling Iron
Choosing the curling iron involves considering factors such as your hair type, desired type of curls and personal preferences. Here are some essential things to think about when selecting the curling iron;
1. Barrel Size;
The size of the barrel determines the size of the curls you'll achieve. Smaller barrels ( 1/2 to 1 inch) create curls while larger barrels (around 1 1/4 to 2 inches) produce looser waves. Consider your desired look. Choose a barrel size accordingly.
2. Hair Type;
Different hair types may require curling irons. If you have hair using a barrel might be more effective, in holding the curls. On the hand thicker hair might require a barrel to create well defined curls.
3. Material;Different materials, like ceramic, tourmaline and titanium are used to make curling irons. Ceramic and tourmaline barrels emit heat evenly. Help reduce frizz making them suitable for hair types. On the hand titanium barrels heat up quickly. Are ideal for coarse or hard to curl hair.
4. Heat Settings;
It's important to look for a curling iron that allows you to adjust the heat settings. This is especially beneficial if you have damaged hair since you can select a heat setting to prevent any unnecessary damage caused by excessive heat.
5. Quick Heat Up Time;
If you're in a rush having a curling iron with a heat up time can save you time and avoid any frustration.
6. Clamp vs Wand;
Curling irons come in two styles; those with a clamp and those without (wand style). For beginners or those seeking curls clamped irons are easier to use and provide results. However wand style irons offer versatility when it comes to creating curl styles.
7. Cord Length and Swivel;
Ensure that the curling iron has a cord length for your needs while also considering the convenience of a swivel cord that prevents tangling while styling your hair.
8. Brand Reputation and Reviews;
It's worth considering known brands, with reviews when purchasing a curling iron.
To gather information, about the curling irons performance, durability and safety it would be beneficial to research and read reviews from users.
9. Additional Features;
Consider looking for curling irons that offer features such as shut off, a digital temperature display or various curling attachments. Think about which features are important to you.
10. Budget;
It's essential to establish a budget and find a curling iron that meets your needs without exceeding your limits.
Remember that practice is key when it comes to curling your hair. It may take some trial and error to discover the curling iron and technique that work best for your hair type and desired style.
Prepare Your Hair
Properly preparing your hair before using a curling iron is crucial, for achieving results and ensuring lasting curls. Here is how you should prep your hair before styling;
1. Start with Freshly Cleaned Hair;
Begin with washed and conditioned hair. Opt for a conditioner that won't weigh down your strands. Avoid oily products that can make your hair appear greasy.
2. Apply Heat Protectant;
to using any heat styling tool apply a heat spray or serum to safeguard your hair from potential heat damage while maintaining its overall health.
3. Make sure your hair is completely dry, before using a curling iron. Curling damp hair can result in curls and cause damage to your hair.
4. Use a wide tooth comb or detangling brush to remove any knots or tangles from your hair. Having tangled hair can lead to curls. Make the curling process more challenging.
5. If your hair is very fine or slippery you can consider applying a texturizing spray or dry shampoo to add some grip and texture. This will make it easier for the curls to hold.
6. Divide your hair into sections based on its thickness; typically 1 to 2 inch sections work well. Use clips or ties to keep the sections separated.
7. If your curling iron allows you to adjust the heat settings choose a temperature that suits your hair type. Lower heat settings are recommended for damaged hair while higher temperatures can be tolerated by thick hair.
8. Curl the sections of your hair away, from your face;For a natural appearance its recommended to curl the sections of hair away, from your face. This technique helps to enhance your features and create a look.
9. Curling Technique;
To achieve your desired curls take a section of hair. Wrap it around the curling iron. Depending on the type of curls you prefer hold the iron either vertically or horizontally. Hold the hair in place for a seconds ( 5 10 seconds) before releasing it.
10. Allow Curls to Cool;
After curling each section release the curl and let it cool in your hand for a seconds before moving on to the next section. This step helps set the curls in place.
11. Finish with Hairspray (Optional);
Once all sections are curled you can optionally apply a mist of flexible hold hairspray to set the curls and prevent them from loosening quickly.
Remember that practice makes perfect when it comes to curling your hair. Feel free to experiment with techniques, directions and sizes of curls until you find the style that suits you best.
Section Your Hair;
Properly dividing your hair into sections before curling is essential, for achieving well defined curls. Here's how you can effectively section your hair for curling;
1. Prepare Your Tools;
Before you begin make sure you have the following tools a comb or brush hair clips or elastics and either a curling iron or a curling wand.
2. Determine the Size of Each Section;
The size of the sections you create will depend on how thick your hair's what kind of curls you desire. In general smaller sections will give you curls while larger sections will result in waves. Here are some guidelines;
If you have hair; Opt for sections, 1 inch or less.
If your hair is medium, in thickness; Go for sections around 1 to 1.5 inches.
If your hair is thick; Use sections, around 1.5 to 2 inches or more.
3. Decide on Your Desired Parting;
Choose where you want to part your hair – in the center on one side or, without any part – and use a comb or your fingers to create it. This will help guide how you divide your hair into sections.
4. Divide Your Hair Into Sections;
Start dividing your hair into portions. You can use clips, ties or pins to keep each section separated as you work through styling.
5. Begin Sectioning from Bottom Layers;
For the curling results start with the lower layers of your hair and gradually move upward as you work through each section.
Here's a step, by step guide on how to section your hair for curling;
Bottom Layer;
1. Begin by taking a section of hair from the back of your neck and clip the rest of your hair up and away.
2. Divide this section into subsections depending on the size of your curling irons barrel. This ensures that each strand receives heat for curls.
Middle Layer;
3. Release the layer of hair, above the curled section.
4. Again divide this layer into subsections as you work around your head.
Top Layer;
5. Finally release the layer of your hair.
6. Divide this layer into sections. Curl them as well.
Clip Up Unwanted Hair;
7. While working on each section clip aside any curled or uncurled sections to avoid them getting tangled with the sections you're currently working on.
Curl Each Section;
8. Take one section at a time remove any clips or elastics and curl it using your curling iron or wand. Remember to curl from your face for a flattering result.
Repeat the Process;
9. Continue working through all the sections until you've curled all of your hair.
To achieve a look it's important to let your hair cool, after curling each section. Gently tousle the curls with your fingers to help them relax and blend together.
For long lasting curls take your time. Be patient especially when working with smaller sections of hair.
Now it's time to have some fun by curling your hair! Begin with the section taking pieces of hair and wrapping them around the barrel of the curling iron. Be cautious not to burn your fingers. Hold each curl in place for a seconds before releasing it. Repeat this process until all the hair, in that section is curled then move on to the section. For a appearance remember to vary the direction of the curls.
Once you have finished curling all of your hair it's time to complete and set your hairstyle. Use either a wide tooth comb or your fingers to brush through the curls creating volume and texture. Finally apply a flexible hold hairspray to keep those curls in place while also preventing frizz.
Conclusion
Creating curls may seem a bit daunting initially. Fear not! With the tools and techniques you can effortlessly achieve curls every single time. Just keep in mind these steps; selecting the curling iron properly preparing your hair dividing it into sections beginning the curling process and finally finishing and setting your desired style. By following these guidelines you'll be able to enjoy lively curls that will last throughout the day. So don't hesitate to explore styles and embrace the joy of creating looks that highlight your natural beauty!


Leave a comment
All comments are moderated before being published.
This site is protected by hCaptcha and the hCaptcha Privacy Policy and Terms of Service apply.