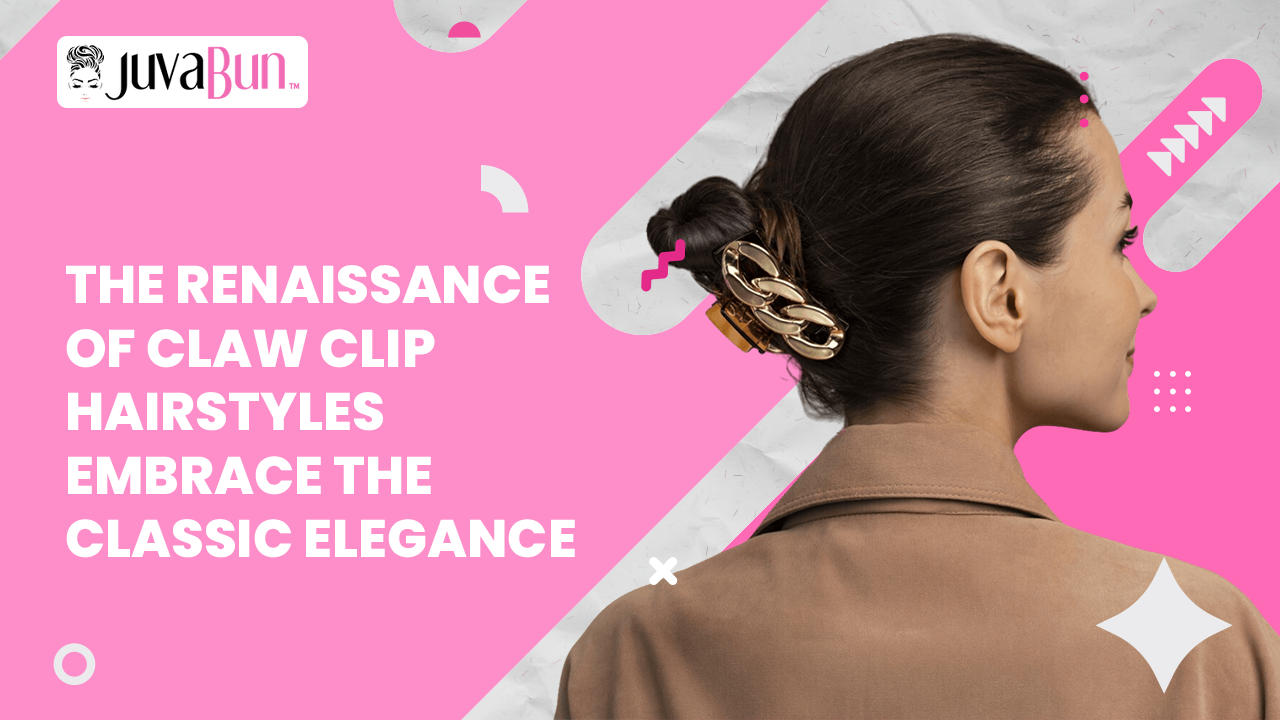
Once a mainstay of 90s fashion, the claw clip has recently re-emerged on the fashion scene, redefining the hair game for trendsetters across the globe. This practical and versatile hair accessory is no longer just a tool to secure your hair while washing your face or doing makeup; it's being reimagined as a statement piece to elevate any hairstyle, casual or sophisticated. This article explores some of the most stunning claw clip hairstyles you can experiment with for an effortless yet chic look.
The Undying Charm of the Claw Clip
The claw clip, known for its durability and easy application, has been cherished by women for decades. Its unique design, with interlocking "claws," helps secure hair comfortably, avoiding any damage or breakage that other hair ties or bands can cause. The claw clip's resurgence has been welcomed by those who appreciate the convenience and simplicity it brings to hairstyling.
Here are some of the trendiest claw clip hairstyles making a splash in today's fashion world.
The Classic French Twist
The Classic French Twist, also known as a French Roll, is an elegant and timeless hairstyle that has stood the test of time. This look is perfect for formal occasions, office settings, or any time you want to add a touch of sophistication to your style. And with the claw clip, achieving this chic hairstyle becomes more manageable and quicker. Here's a step-by-step guide on how to create the Classic French Twist using a claw clip:
Materials Needed:
- A Claw Clip
- Comb or Brush
- Bobby Pins (Optional)
- Hairspray (Optional)
Step 1: Preparation
Start by brushing your hair to remove any tangles. Smooth hair is easier to work with, resulting in a neater French Twist. If your hair is freshly washed, add some texturizing spray or dry shampoo for a bit of grip and volume.
Step 2: Gather Your Hair
Gather all your hair at the nape of your neck as if you're making a low ponytail. This is the base of your French Twist.
Step 3: Twist and Roll
Start twisting your gathered hair to the right or left (your preference). As you twist, your hair naturally starts to fold into a roll. Continue twisting until your hair is tightly coiled.
Step 4: Secure the Twist
Once your hair is tightly twisted, take your claw clip and secure the twist against your head. The clip should capture most of the twist, leaving the ends of your hair sticking out from the top. The claw clip's "claws" should be facing upwards, with the clip's opening facing downwards.
Step 5: Tuck and Secure
Take the ends of your hair sticking out from the top of the twist and neatly tuck them into the roll. You can secure these ends with bobby pins for extra hold if needed.
Step 6: Final Touches
Inspect your French Twist in the mirror, ensuring everything is smooth and secure. If you notice any loose strands, secure them with bobby pins or a spritz of hairspray for a sleeker look.
Voila! You've successfully created a Classic French Twist using a claw clip. With its elegant and sophisticated allure, this timeless hairstyle is a perfect way to add a touch of classic glamour to your look. Practice makes perfect with the French Twist, so don't be discouraged if it takes a few tries to get right.
The Half-Up, Half-Down
The half-up, half-down hairstyle is a popular choice for many due to its versatility and the balance it provides by allowing you to enjoy the best of both worlds: the elegance of an updo and the casual charm of letting your hair down. It's a style that works with virtually any hair type: straight, wavy, curly, or coily. Here's how you can create the half-up, half-down hairstyle with a claw clip:

Materials Needed:
- A Claw Clip
- Comb or Brush
- Hairspray (Optional)
Step 1: Section Your Hair
Start by brushing your hair to remove any tangles and ensure it's smooth. Next, section your hair horizontally from ear to ear. The idea is to take the top part of your hair and leave the rest down. You can decide how much hair you want to pull up; more hair will give a higher, more dramatic half-updo, while less hair will result in a subtler look.
Step 2: Secure the Half-Up Section
Gather the top section of your hair as if you are creating a half ponytail. Twist it once or twice, depending on the thickness of your hair. Position the twist at the back of your head and secure it with the claw clip. Ensure the clip tightly holds your hair to stay in place.
Step 3: Adjust and Set
After securing the top section, take a moment to pull at the crown of your hair gently. This will give the style more volume and a slightly messy, laid-back aesthetic. If you prefer a more polished look, you can skip this step.
Step 4: Finalize the Style
Check your hairstyle in the mirror. Adjust the loose hair at the bottom as needed, deciding whether you want it to be straight, wavy, or curly. Finally, set the style with a light mist of hairspray if desired.
The half-up, half-down claw clip hairstyle is perfect for casual outings, office settings, or whenever you want a quick and stylish change from letting your hair fully down. It's a simple, yet effective way to bring a trendy and stylish look without much effort. Enjoy your new look and the versatility it brings!
The Messy Bun
A messy bun is the epitome of effortless chic – it's stylish, laid-back, and the perfect hairstyle for those busy days when you're short on time. Using a claw clip instead of a traditional hair tie can reduce the stress on your hair and add a fun, fashionable touch. Here's a step-by-step guide on how to create a perfect messy bun using a claw clip

Materials Needed:
- A Claw Clip
- Comb or Brush
- Bobby Pins (Optional)
- Hairspray (Optional)
Step 1: Gather Your Hair
Start by brushing your hair to smooth out any tangles. Next, gather all your hair into a high ponytail. Don't worry about making it too neat; the charm of a messy bun lies in its carefree, tousled look.
Step 2: Twist and Fold
Twist the ponytail from base to tip. Then, fold the twisted ponytail into a loose bun by wrapping it around the base where you're holding it. Remember, the goal is to create a casual, relaxed look, so there's no need to aim for a tight, ballerina-style bun.
Step 3: Secure the Bun
Now, grab your claw clip and secure the bun. Ensure that the clip captures both the base of the bun and some of the twisted hair. Depending on the size of your claw clip and the thickness of your hair, you may need to use more than one clip.
Step 4: Adjust and Tug
After securing the bun, use your fingers to tug at it gently and loosen it. This will create a "messy" look. If any strands of hair fall out or stick out, that's okay – they add to the laid-back aesthetic.
Step 5: Set the Style
Look at your hairstyle in the mirror. If any sections feel too loose or if the bun isn't sitting right, use bobby pins to secure those parts. For extra hold, finish off with a light spritz of hairspray.
And there you have it! The messy bun with a claw clip is a quick, easy hairstyle that adds a stylish touch to any casual outfit. Plus, it's a great way to keep your hair out of your face while still looking chic. Enjoy your new relaxed and trendy look!
The Low Chignon
The Low Chignon is a classic and elegant hairstyle that involves creating a low bun or knot at the nape of the neck. It's a versatile hairstyle suitable for both formal and casual occasions. Here are the steps to create a Low Chignon:
What you'll need:
- Hairbrush or comb
- Hair tie or elastic band
- Bobby pins
- Hair spray (optional)
Step-by-step instructions:
Prepare your hair: Start with clean, dry, and brushed hair. If you have straight hair, you can create this style on freshly washed hair, but if your hair is naturally curly or wavy, it may hold better if it's not freshly washed.
Part your hair (optional): Decide if you want a center, side, or no part. This step is optional and depends on your preference and face shape.
Gather your hair low: Gather your hair at the nape of your neck as if you were creating a low ponytail. Hold it with one hand and use a hair tie or elastic band to secure the hair in a low ponytail. Ensure it's tight enough to hold the hair in place but not too tight to avoid discomfort.
Create a bun: Twist the ponytail around the base to form a bun. Keep wrapping until the hair forms a neat knot or bun. Tuck in any loose ends as you go.
Secure the bun: Use bobby pins to secure the bun in place. Insert the pins through the bun and into the base of the ponytail to anchor it firmly.
Tidy up: Gently tug on the sides of the bun to make it slightly wider and more voluminous. This will give it a softer and more relaxed look.
Set the style (optional): If you want your Low Chignon to stay in place all day or night, you can use some hair spray to set the style and prevent flyaways.
Tips:
You can tease the ponytail slightly for a more textured look before creating the bun.
You can add hair accessories like decorative pins, flowers, or ribbons to enhance the elegance of the Low Chignon.
You may need more bobby pins to secure the bun properly if you have very long or thick hair.
The Low Chignon is a timeless hairstyle that suits various occasions, from weddings and formal events to a day at the office or a casual outing. With a little practice, you can easily achieve this sophisticated and graceful look.
The High Ponytail Twist
The High Ponytail Twist is a chic and stylish variation of the classic high ponytail. It involves twisting the hair to create a more textured and interesting look. Here's how you can achieve the High Ponytail Twist

What you'll need:
- Hairbrush or comb
- Hair tie or elastic band
- Bobby pins
- Hair spray (optional)
Step-by-step instructions:
Prepare your hair: Start with clean, dry, and brushed hair. This style works best on smooth and sleek hair, so you should straighten it before starting if it's naturally curly or wavy.
Gather your hair high: Using a brush or comb, gather all your hair at the crown of your head. Hold it with one hand, and with the other hand, smooth out any bumps or lumps to create a sleek look.
Create a high ponytail: Secure your hair with a hair tie or elastic band to create a high ponytail. Make sure it's positioned right at the crown of your head for the best effect.
Divide the ponytail into two sections: Take the ponytail and split it into two equal sections.
Twist the sections: Take one section and twist it around the other section. Keep twisting until you reach the end of the ponytail.
Secure the twist: Once you have twisted the two sections together, use a bobby pin to secure the ends of the sections. Insert the pin horizontally through the twisted hair to hold it in place.
Tighten the twist (optional): If you want a more voluminous and textured look, gently tug on the twisted sections to widen and loosen the twist slightly. This will give the ponytail more volume and make the twist look more prominent.
Set the style (optional): If you want your High Ponytail Twist to stay in place all day, you can use some hair spray to set the style and prevent any flyaways.
Tips:
You can add a small amount of hair serum or oil to your hair before creating the ponytail to add extra shine and smoothness.
The twist may naturally look more intricate and appealing if you have long hair.
For a more polished look, you can take a small section of hair from the ponytail and wrap it around the hair tie to hide it. Secure the wrapped section with a bobby pin underneath the ponytail.
The High Ponytail Twist is a sophisticated and versatile hairstyle that can elevate your overall appearance. It's perfect for casual and formal occasions, and with some practice, you can easily master this elegant look.
Conclusion
The resurgence of the claw clip signifies the beauty of vintage trends making a comeback in modern times. With its convenience, versatility, and endless styling potential, the claw clip is no longer a forgotten hair accessory but a stylish statement piece. Whether you're getting ready for a day at the office, a night out, or just an easygoing day at home, there's a claw clip hairstyle perfect for every occasion. So, it's time to dig out that claw clip from the back of your drawer and make it your new favorite accessory.





Leave a comment
All comments are moderated before being published.
This site is protected by hCaptcha and the hCaptcha Privacy Policy and Terms of Service apply.