Table of Contents
If you have naturally straight hair, it can be very frustrating when you try to make curls and have them stay in. Many people who have straight hair and have attempted to do curls have ended up in the same boat. The curls start off bouncy and full and then out of nowhere it falls flat and lays limp. Below we are going to be looking into different methods that can help make your straight hair curly.

21 Steps On How To Make Straight Hair Curly
Here is a step-by-step guide on how to make your straight hair curly:
STEP 1: Prepare Your Hair
Do not use a smoothing, straightening shampoo and conditioner. Rather use a shampoo and conditioner that will add more texture to your hair. The more volume you have, the better your curls will be.
STEP 2: Apply a Heat Protectant to your hair
By using a heat protectant on your hair, you will protect it from damage when you use a blow-dryer and a curling iron. The heat protectant will also speed- up the time you spend on drying your hair as it allows hair to dry faster.
STEP 3: Curl and Pin Your Hair
How you get your hair to stay in depends on the method of curling that you do. Start by dividing the hair into 1-inch sections of hair. You can make it tighter if you are worried that it might fall. After you have made the curl with the curling iron, take the spiraled hair, and pin it flat to your head with a bobby pin or two to keep it in place.
STEP 4: Spray your hair and allow it to set
While the curls are pinned up, they will cool off and set as well. Spray your hair with hairspray over the bobby pins to further set them. Allow setting a little bit before undoing them.
STEP 5: Let your hair down
Remove the bobby pins very gently and untangle your hair from the spirals that you have made. Your curls should be tight and perfectly set. Depending on how you want your curls to look, use your fingers to separate your curls for a fuller, voluminous appearance.
STEP 6: Add an Extra Hold
You can use a holding cream or paste to help keep those curls intact. Use a dime-sized piece on the palm of your hand and rub your hands together before you work the cream through your hair. Here is a list of methods that you can try to make your straight hair curly.
STEP 7: Try a Styling Clay
Choosing a clay to take note of the texture, some formulas can be heavier and give the style more muscle or body than you might want. However, your curls will stay in place. Try to use a light-holding clay or a wax that will be like a forming cream and it will make it easier for you to shape your hair into the curls that you want. Use little cream or product and add on if necessary.
STEP 8: Adjust the heat setting to your hair type
The thicker your hair is the higher you must set your curling iron. If you have thin, stick-like strands you must use a curling iron that can be adjusted and keep it on its lowest setting to avoid frying your hair.
STEP 9: Use a Lighter Conditioner
Depending on the products we use, it can affect how our hair turns out. A heavy conditioner can be the reason why your curls fall flat as it adds weight to your hair. By using a lighter formula, and only applying it to the ends rather than applying it to the roots.
STEP 10: Avoid Washing Your Hair
The dirtier your hair, the more shape it holds. Clean hair is smooth, silky, soft, and shiny. The oilier your hair the easier it is to hold the shape. You can add to this by using dry shampoo to soak up some of the oil on the roots of your hair and a volumizing spray can be used on the ends.
STEP 11: Use a Smaller Iron
The more tightly you curl your hair the more likely it is to stay in. Use a curling iron that has a barrel that is a touch smaller than the size you’d often use.
STEP 12: Cool the Curl
If your hair is hot from all your styling tools, the texture will stretch out and fall much easier because it still needs to set. Cool your hair by holding it in your hand for about 10 seconds after you curl each piece. Cooling them off prevents them from falling flat.
STEP 13: Shake the Curls, Don’t Brush Them
By shaking the curls, you allow the shape to straighten more quickly. Gently run your fingers around the curls to shape them into the style you want.
STEP 14: Don’t use too much Hairspray
Use a very light hairspray to help set your curls in place. Using a heavy-hold spray can weigh down your hair. When using the hairspray, tilt your head forward and spray your hair. Use the hairspray at an arm’s distance. Creating distance between your curls and the hairspray means that your curls won’t soak up the product and fall flat, this will hold their shape for longer.
STEP 15: Use Hairspray on your Brush
Use hairspray on your brush if you are going to brush out your curls. This will help distribute the hairspray evenly throughout all your curls from the top of your head to the bottom and it will also prevent your strands from being weighed down by having too much spray on it. You can also add in a hydrating shampoo and conditioner to keep your hair healthy if you are someone that uses heat regularly.
STEP 16: Look into Other Options
Sometimes your hair texture does not allow for any curls to be made. You can try getting a salon treatment used as a digital or body wave. Digital waves are a special curling iron that creates beachy waves that you can air dry.
STEP 17: Hot Rollers
Heat your rollers and while you wait for your rollers to reach the desired temperature. Don’t forget to apply a heat protectant to your hair. Take a one-inch section of your hair and place the roller a few inches away from your roots. Hold the roller by the edges to avoid burning your hands. Wrap your hair slowly and evenly around the roller towards your scalp and then clip it into place. Continue with this process until you have done your whole head.
Wait the required time and then take the rollers out, brush your curls with your fingers to give it a much softer look. Spray holding spray onto them.
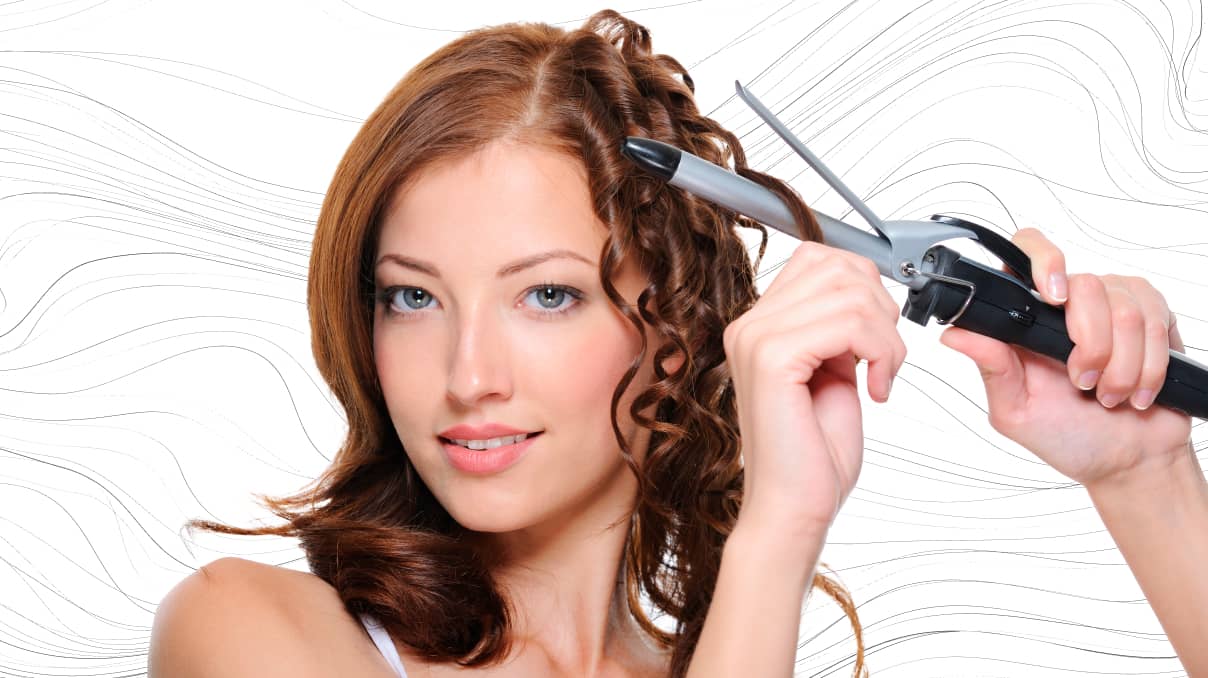
STEP 18: Using a Curling Wand
Make sure to protect your hair with a heat protectant. Section your hair and place the curling wand at the root. Wrap your hair around the curling wand and wait for a few seconds for your hair to shape by the heat. Release the hair from the curling wand and reveal your curl. Depending on how you want your curls you can use smaller or larger sections of your hair to curl at a time. Repeat the process throughout your whole head. Keep your curls in place by spraying them with a setting spray.
STEP 19: Using Foam Rollers
Detangle your hair first before you start on your rollers. Take a small section of hair and place your foam rollers at the end of your hair. Roll your roller up the section of hair until you get to your root.
Make sure to wrap your hair smoothly and evenly along with the roller. Clip the roller into place and you’re all set to go. Do this process throughout your whole head. You can choose between two methods when using foam rollers. You can use them in the morning and have them set throughout the day if you want to have a night out with curls. The second option is that you can sleep with these rollers in and have them ready for a day out.
Also, sleep on a silk pillowcase to avoid any frizzing or flyaways. Once you remove the foam rollers, use hairspray to have them set.
STEP 20: Overnight Twists
This is a heat-free option that you can use to curl your hair. Brush and detangle your hair to make sure that it is smooth. Section 1-inches in your hair and twist them from the ends. Twist the twisted strands and tie them into tiny buns on your head and pin them into place with a bobby pin. Wrap your head in a silk scarf to prevent the buns from coming loose during the night. Undo the buns in the morning and gently comb through with a wide-tooth comb or your fingers. Use hairspray to keep your curls intact.
STEP 21: Using a Flat Iron
First blow- dry your hair to get it smooth. Then split your hair into sections and begin curling your hair by clamping your hair inside the flat iron and wrapping the ends of your hair over the flat iron- while twisting the iron towards you.
Be sure to hold it for a few seconds. While gripping onto the ends, gently pull the iron down towards the ends of your hair and then release it.
If you have short hair, clamp a section of your hair by starting as close to your roots as you possibly can.
Twist the flat iron away from your face and hold the hair for a few seconds. Let go of your grip, slightly and roll your hair in between the plates of the flat iron to repeat.
Then, clamp and release the flat iron until you get to the ends of your hair.
Separate the waves with your fingers and use a setting spray.

The Best Products for Curling Straight Hair
Here is a list of the best products that can be used to curl straight hair.
-
Pre- Stylers
These products are found in the form of sprays, cremes, and serums. These are used before you apply any heat to your hair. They build grit and add some texture to your hair which helps your hair mold and take shape quicker with the help of the heat from the hair curling tool.
-
Curl Enhancers
These products include shaping and defining gels and creams that help keep your curls shiny and separated and frizz-free. They also help your curls bounce and have a more defined shape.
-
Curl Sprays
These products are humidity-proof and their formulas help curls stay defined and have them feeling and looking non-crunchy. These sprays protect hair from feeling sticky and protect against frizz.
-
Permanent Solutions
You can choose to do a perm at your hair salon as these treatments involve changing the structure of your hair permanently until it grows out. It then re- bonds the hair into a new shape.
-
Curl Revivals
You simply spray this product onto dry hair and separate your hair into small sections. Then use your fingers or curling iron and re-shape and re-style your curls until you have them back to their original state. Let the product dry just before you use your hot iron.

Key Takeaways!
Having straight hair can become boring over time and not being able to simply wash and wear your hair can be frustrating as straight hair dries quicker and hangs limp once dried. Use these tips and methods to help you curl your straight hair by following these easy instructions.
Be sure to check the list of the best products to make sure that you have all the right tools, equipment, and hair care products to effortlessly achieve this hairstyle. Starting out might be a bit risky as first attempts always are, but keep practicing different methods to find the one that is best suited for you. For More tips visit JuvaBun.



Leave a comment
This site is protected by hCaptcha and the hCaptcha Privacy Policy and Terms of Service apply.